If you happen to have an older network printer that still works like a charm and want to make it available via WiFi & AirPrint, then this post is for you!
This whole project came to life when I decided to give my old HP M1120n MFP a chance at being useful, and I still have two unboxed toner cartridges that I didn’t want to go to waste. Even though the printer has an Ethernet port and could be easily plugged in any switch or router, my router was not nearly close to the location where I wanted to use the printer, and I really wanted to print from my iPhone. The end goal was to be able to print from anywhere in my house via WiFi, and from any device – iPhone included.
If you find yourself in a similar situation – look not further, the solution is below. These are the items you need for this mini project:
- A network ready printer – my printer is an HP M1120n MFP
- A network cable
- A Raspberry Pi running Raspbian – I used a Raspberry Pi 3 that already had WiFi and an Ethernet port, but you could basically use any other model
Part 1. Make you printer WiFi ready
I assume you already have your Raspberry Pi setup and running Raspbian OS. If you don’t – please follow the instructions from the official website.
The first thing to do is connect to your local WiFi network. You can either do this via the UI or by running the following command and keying in the connection details:
sudo nano /etc/wpa_supplicant/wpa_supplicant.confUpdate your details accordingly:
ctrl_interface=DIR=/var/run/wpa_supplicant GROUP=netdev
update_config=1
country=RO

network={
	ssid="YOUR_SSID"
	psk="YOUR_PWD"
	key_mgmt=WPA-PSK
}
Next step is making sure your OS is up to date, so go ahead and run the following commands:
sudo apt-get update
sudo apt-get upgrade
In order to make your printer, connected to the ethernet port of the Raspberry Pi, use the WiFi interface, we need to install a package called DNSMASQ. Go ahead and run the following command:
sudo apt-get install dnsmasqIdeally, you’d want to have a fixed IP address for your WiFi connection and for your printer so you wouldn’t risk not being able to connect to either the Raspberry Pi or printer in case of a power outage. It’s also recommended that the printer gets an IP address from a different subnet than the one used by your router – just in case the same IP gets assigned to another device, you wouldn’t run into any conflicts. I decided to use the 192.168.1.200 IP address for the Pi and 192.168.2.200 for the printer. You can define your static IPs by editting the dhcpcd.conf file:
sudo nano /etc/dhcpcd.confThese are my settings:
interface wlan0
metric 200
static ip_address=192.168.1.200/24
static routers=192.168.1.1
static domain_name_servers=192.168.1.1

interface eth0
metric 300
static ip_address=192.168.2.1/24
static routers=192.168.1.1
static domain_name_servers=192.168.1.1
My router’s network is 192.168.1.0/24 and the network I’ve decided to use for the printer is 192.168.2.0/24.
After updating the dhcpcd.conf file, go ahead and update the dnsmasq.conf file:
sudo nano /etc/dnsmasq.confinterface=eth0 # Use interface eth0
listen-address=192.168.2.1 # Specify the address to listen on
bind-interfaces # Bind to the interface
server=8.8.8.8 # Use Google DNS
domain-needed # Don't forward short names
bogus-priv # Drop the non-routed address spaces.
dhcp-range=192.168.2.200,192.168.2.200,24h # IP range and lease timeI have only allowed one IP address to be served to the printer in order to make sure the IP will not change in case of a power outage.
Update the sysctl.conf file to enable ipv4 forwarding. Open the file:
sudo nano /etc/sysctl.confUpdate this line:
#net.ipv4.ip_forward=1To this:
net.ipv4.ip_forward=1Run to following commands to ensure traffic flows from eth0 to wlan0:
sudo iptables -t nat -A POSTROUTING -o wlan0 -j MASQUERADE
sudo iptables -A FORWARD -i wlan0 -o eth0 -m state --state RELATED,ESTABLISHED -j ACCEPT
sudo iptables -A FORWARD -i eth0 -o wlan0 -j ACCEPT
Given the fact that the iptables get flushed at every reboot, we need to ensure these settings are persisted. To accomplish this, we need to save the settings and rewrite them after each reboot.
Save the setting by running:
sudo sh -c "iptables-save > /etc/iptables.ipv4.nat"Update the /etc/rc.local file in read the settings after a reboot. Open the file:
sudo nano /etc/rc.localAdd the following line above the exit 0 line:
iptables-restore < /etc/iptables.ipv4.natAfter updating all of the files above, go ahead and connect your printer to the Pi board and restart the services as follows:
sudo service dhcpcd restart
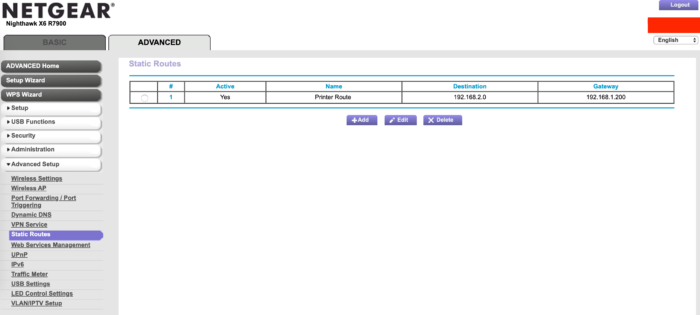
sudo service dnsmasq startThere is one more step you need to do in order to access your printer. As you might assume, you computer might not know how to access the 192.168.2.0/24 network. You will need to add a static route in you router configuration to achieve this. I’m using a Netgear router – check the screenshot bellow the configuration required to add a static route.
With the last step done, you can access your printer via WiFi! Go ahead and add a new IP printer.

Part 2. Enable AirPrint
Once you have your printer WiFi ready, you can easily enable AirPrint. To achieve this, we need to install CUPS:
sudo apt-get install cups cups-pdf python-cupsAdd your Pi user to the lpadmin group in order to be able to administer CUPS:
sudo usermod -aG lpadmin usernameUpdate the /etc/cups/cupsd.conf file in order to administer CUPS from your computer:
sudo nano /etc/cups/cupsd.conf- Change the listen address from Listen localhost:631 to Port 631.
- Add ServerAlias * after DefaultAuthType Basic
- Add Allow @Local in the elements under these comments: # Restrict access to the server…; # Restrict access to the admin pages…; # Restrict access to configuration files…; # Restrict access to log files…
This is an extract of the file with just the updates mentioned above:
# Only listen for connections from the local machine.
Port 631
Listen /run/cups/cups.sock

# Default authentication type, when authentication is required...
DefaultAuthType Basic
ServerAlias *

# Restrict access to the server...
<Location />
 Allow @Local
 Order allow,deny
</Location>

# Restrict access to the admin pages...
<Location /admin>
 Allow @Local
 Order allow,deny
</Location>

# Restrict access to configuration files...
<Location /admin/conf>
  Allow @Local
  AuthType Default
  Require user @SYSTEM
  Order allow,deny
</Location>

# Restrict access to log files...
<Location /admin/log>
  Allow @Local
  AuthType Default
  Require user @SYSTEM
  Order allow,deny
</Location>
Save the file and restart the service:
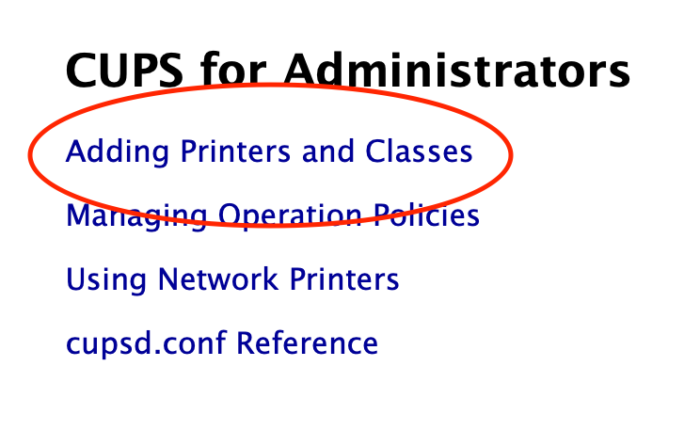
sudo service cups restartNavigate to the CUPS administration console (https://192.168.1.200:631) and add your printer by clicking on Adding Printers and Classes from the middle section of the page:
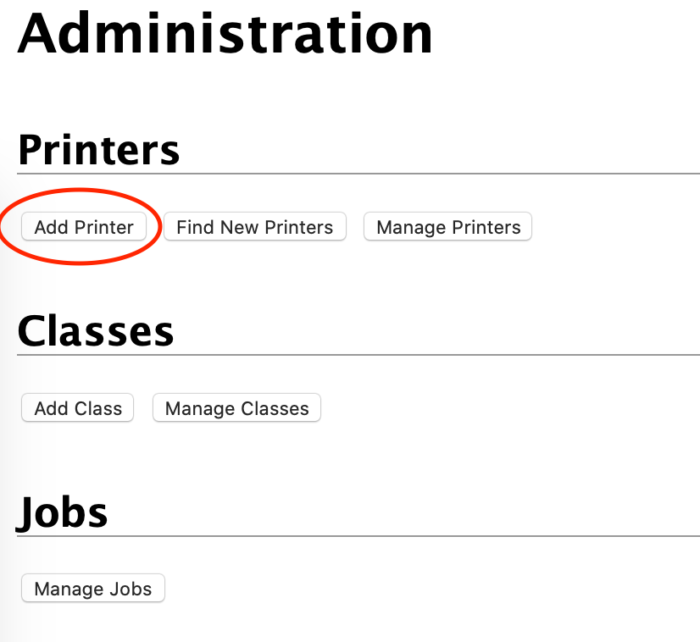
Click on Add Printer and login with the user you’ve added earlier to the lpadmin group:
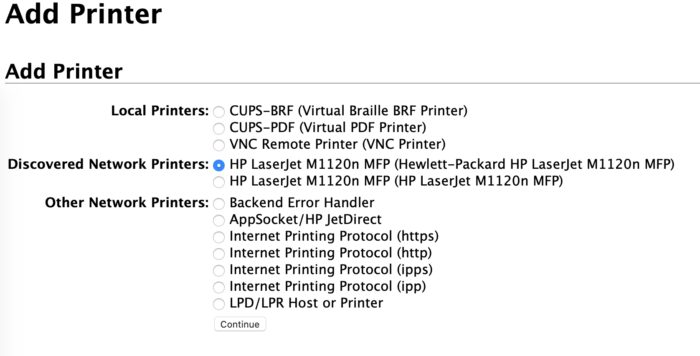
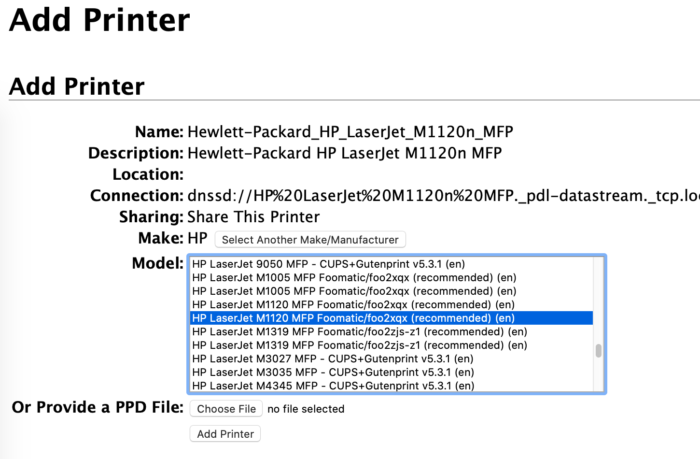
Select your network discovered printer, provide a name, description and address:
Chose the Make & Model and hit the Add Printer button. Alternatively, if you do not see you printer in the list, you could provide the PPD file.
You should now be able to print from your iPhone:
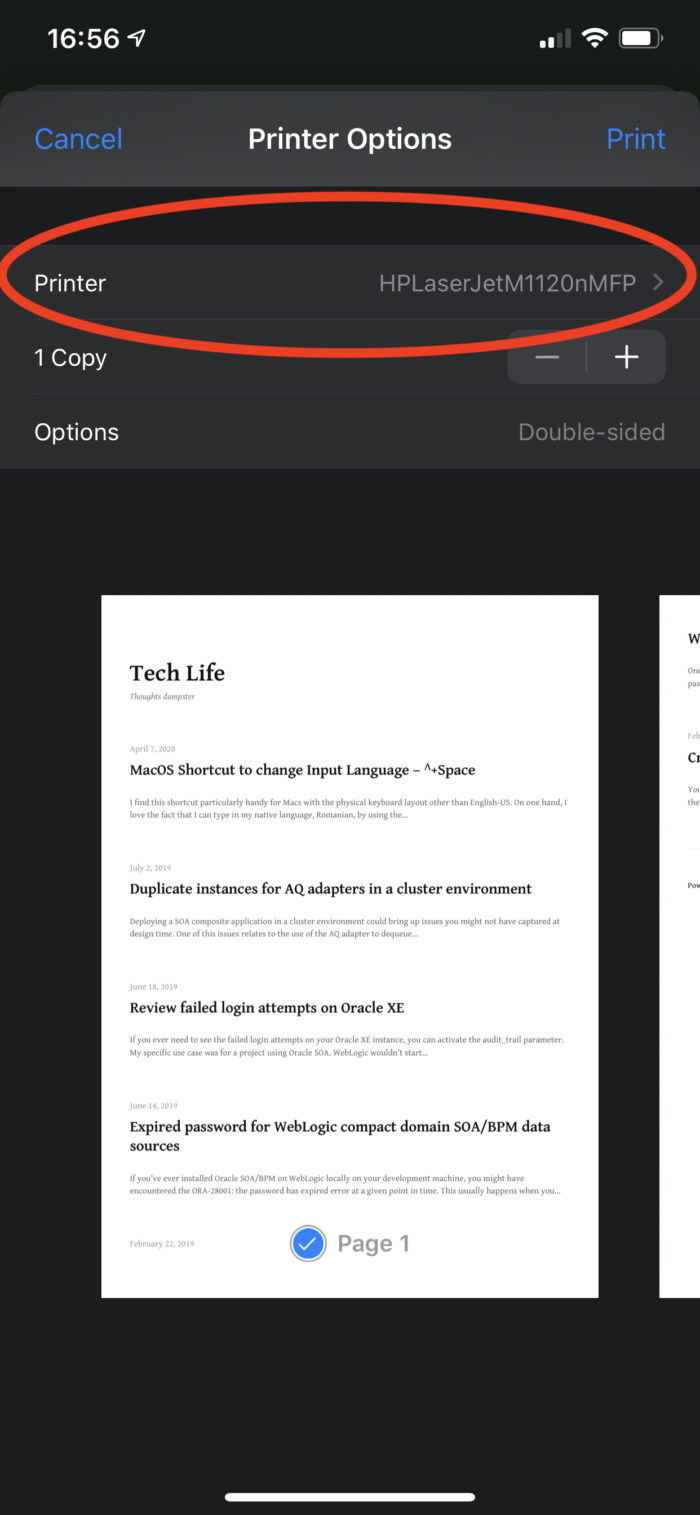
Enjoy printing from any device!